How to Install DripDiapers®
Leaks from interior construction equipment may be inevitable, but the headaches caused by extra clean-up and the damage they do to your floors don’t have to be. Designed with a high-volume absorbtivet pad at the center, our DripDiapers® are the cost-effective solution that collects leaking fluids from the chassis of scissor lifts and other construction equipment.
Installation is a breeze thanks to our included install kit and adjustable bungees with magnetic attachment points. With our seven standard sizes and three pre-cut sizes, you can custom fit your DripDiapers® to any piece of equipment leaving you with reliable floor protection that moves with your machines.
DripDiapers Installation Guide
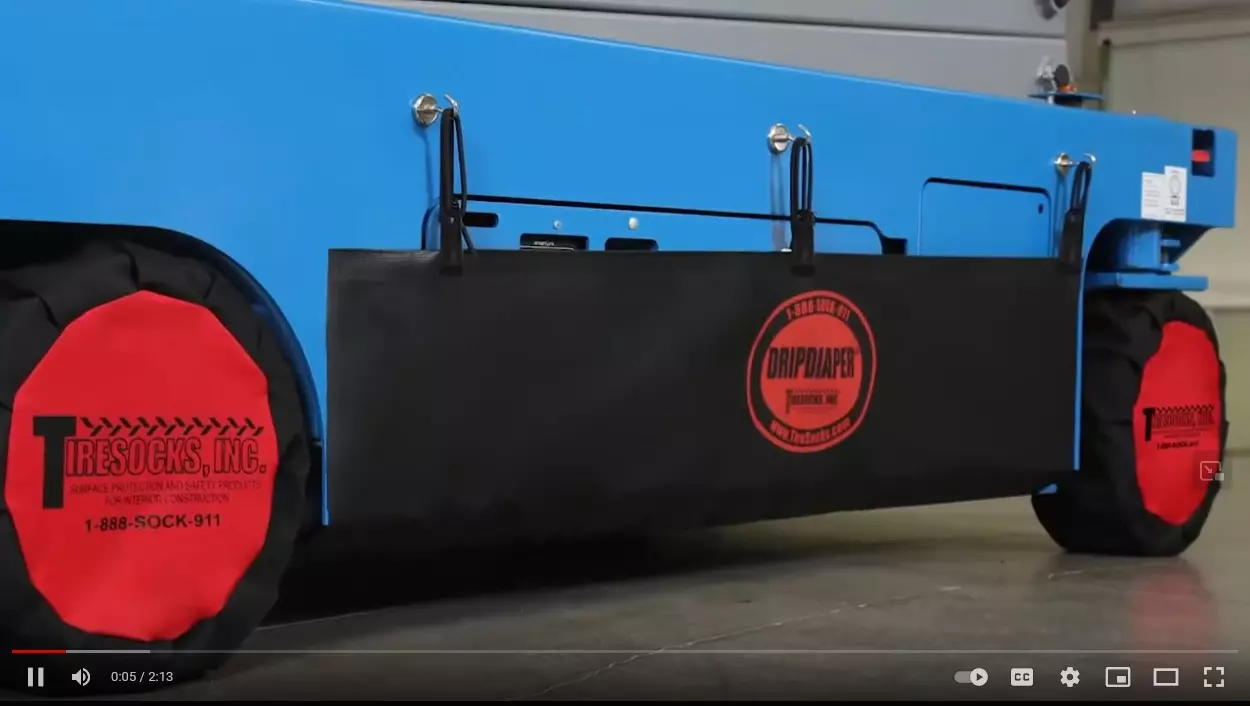
As you install your DripDiaper®, it’s important to adjust your magnet and clip locations when necessary to ensure a proper fit and avoid leaks.
1. Spread the DripDiaper® out in front of your machine with the absorbent pad facing up.
2. Drive into the DripDiaper, centering the machine over top, and use the included scissors to notch the edges of the DripDiaper® where your tire cutouts will go. Leave a two-inch minimum clearance around each tire.
3. Back the machine off the DripDiaper® and complete your tire cutouts.
4. Slide the DripDiaper under the machine again, ensuring that the absorptive pad is still facing up and the tires sit in the cutouts.
5. Attach the clip end of each bungee assembly to the exposed outside edges of the DripDiaper®.
6. Place magnets on your machine near bungee assemblies and attach the hook end of each bungee to the magnet.
Remember to leave some slack in your magnet placement so you can still allow proper operation of pothole protectors. Never attach products to moving machine parts involved in the raising or lowering of platforms.